Monthly Archives: September 2012

RAW Video File Format: Advantages and Disadvantages

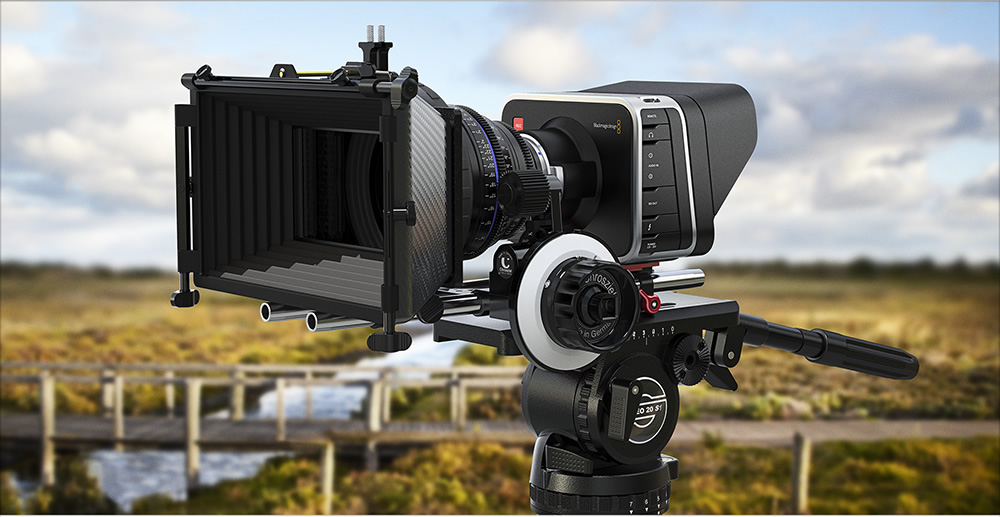
Blackmagic Cinema Camera and RAW File Formats

RAW File Format

I like to think that I’m well informed when it comes to the DSLR / independent film world. I may not be the first to comment on a new product or feature, but I do try to talk about things that I think are relevant to the community. Personally, I like to think of myself as a filmmaker, a writer, and a director, but at the end of the day, I’m really an artist. So like any artist, I want to make sure that I have the best tools at my disposal. If I’m going to paint a picture, I need paints and brushes to help me achieve my vision.


RED Pro 5.0 CameraIn the past few years, the RED camera has been a huge success, and part of that success has to do with its ability to shoot RAW video. Now I’ve seen how amazing RAW video is but for a while I didn’t find it worth my time because it was so far outside my own price range. It was pointless to think about; a pipe dream, a fantasy. But with the emergence of the Blackmagic Cinema camera, all of a sudden RAW video is not only attractive, it’s affordable. So affordable that it borderlines on highway robbery! So I figured now might be a better time than ever to discuss some of the advantages and disadvantages of RAW video. 

RAW Video Advantages

The most attractive bit about filming in RAW is the sheer amount of information that is retained in your video. The details that normally disappear in the shadows and highlights of DSLR footage is completely retained. No longer do you have to sacrifice quality in one area for another. 

Almost every DSLR shoots in an 8 bit color space with 4-2-0 sampling. This means that there are only a certain number of colors to choose from, with only a specific portion of those said colors being sampled. This is where RAW comes in. RAW video typically has a color space between 10bits and 16bits and a sampling of 4-2-2 or 4-4-4-4; which is useful information, but that’s not what RAW file format really means. I’m not going to go into details, but it effectively means that you can capture a huge range of colors and information, and expose your footage in post. You technically have the flexibility to change the way your footage behaves after you film it. It’s much like shooting photographs in RAW. You retain a wide range of information and use that to achieve the best results possible. It’s truly amazing what you can do when you get to color grading.

RAW Video Disadvantages

There’s really only one disadvantage but it’s a big one: Space. The size of these files are astronomical. I shot recently with the new RED SCARLET and we tore through a 64GB SSD in less than 10 takes. Want to shoot a feature length? No problem, you just might need 20TB of storage to hold it all, and that’s pretty expensive. Also think about the computer speed you will need to playback, edit, and color grade the footage. Were talking a minimum quad-core processor and 8GB of RAM. That Macbook you bought in 2009 isn’t going to do the trick. 

So no matter how amazing the footage is, if you don’t have the tools, or the ecosystem set up to take advantage of RAW video, you’re just making things more difficult for yourself. And yes, things do start to get expensive, so make sure that you’re willing to reinvest in a new computer and a lot of storage space to hold it all.

The RAW Conclusion

I love the look of RAW video. It’s all flat and pale looking at first, but the second you get into post and start color correcting it, it’s a whole new world. Colors pop, shadows and  highlights retain texture and detail, and when done right, makes a DSLR looks like a kids toy. Does that mean that I’ll be ditching my DSLR soon? Not exactly, but it’s a truly exciting time for independent filmmakers and I look forward to new technologies and innovations headed our way.

Geary McLeod from ‘The Mentalist’

I highly recommend this to anyone who is even going to dabble in this world. It's a great introduction. Digital SLR is clearly the direction a lot of work is going to go in – one of the producers from 'The Mentalist' is already  interested. So half of my reason for being here is so when he brings it up again, we can have an informed conversation.

Geary McLeod, ASC
'The Mentalist' DP


Canon DSLR Video Techniques: Evaluative Metering and Histograms

Metering and Histograms on Canon HDSLRs

When it comes to shooting video on a DSLR, there’s two easy ways to determine if your video is properly exposed. The first is the use of evaluative metering and the second is the use of a histogram. These two features together are the most accurate means for proper exposure. It’s important to use both of these features together if you want the best looking video straight out of the box.

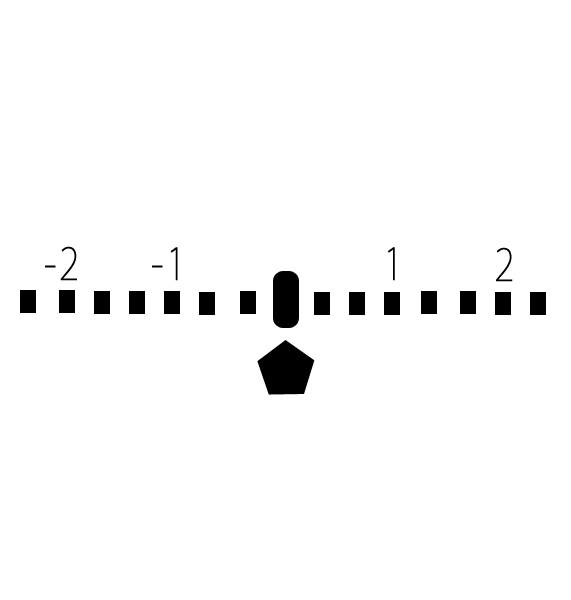
Evaluative metering is the standard in exposure methods. Canon DSLR’s such as the 5D Mark III and the T4i use evaluative metering for exposure, and display this information in the form of a slider. The camera, much like your own eye, analyzes the entire condition of a scene and determines a proper exposure. The exposure meter, or slider, then indicates where you currently stand in relation to that number. If underexposed, the slider will carry a negative position; when overexposed, a positive number. 

                                           Exposure Meter

Obviously you can try to perfectly expose your scene but it’s not always easy. Dark spots and reflections will play a factor in the camera’s final metering, so it’s recommended to meter away from these areas for more accurate metering. Having personally used many different types of DSLR’s, I prefer to shoot two notches below “properly exposed” but it’s different for each camera. I recommend going out and filming scenes in multiple environments to see how your camera reacts. 

The second way is to use a histogram. Having started my career in the television world, it was essential that we used histograms, and over time I’ve used that knowledge to get a better picture from my DSLR. Rather than using a complex camera equation to determine exposure (evaluative metering) the histogram is a visual representation of the light and dark elements of your video.

Histogram

Dark pixels are represented on the left side of the histogram and light pixels are on the right so it’s easy to see if the blacks or whites are overpowering the image. If an image is underexposed, the histogram will skew to the left, and if overexposed, to the right. If the histogram is peaking too hard in one direction or the other, you will end up losing detail. This is because the exposure at each extreme end is getting blended together, effectively crushing colors and detail. It may not seem like as big a deal in the field at the moment, but when you get into post and color grading, you will be disappointed to see you lost details in those areas.

The best method is to incorporate both tools into your everyday shooting and remember that there is no one single way to achieve perfect exposure. Some of my favorite pictures are underexposed in areas because I’m going for a stylistic choice. At the end of the day it comes down to getting comfortable with the camera and with your own artistic vision.

Want to learn more? Join us at our Canon Bootcamp, an extensive two day workshop designed to help you learn more about your camera and teach you the skills to create your own stunning visuals. You can also find out more information by  liking our page on Facebook.

Garrett Warren’s Take on the Canon Boot Camp


I came here today to try to learn how to get a professional film look out of a Canon HDSLR. I learned an awful lot of little intricacies that aren't really covered in a manual. A little bit more like Industry Insider professional ideas that you can do to settings that'll help make the look of the product you're going to shoot, just like film. We were taught even more than I expected, especially about the equipment. He [Chief Instructor Fletch Murray] went into a greater range of detail about the various pieces of equipment that are out there; the ones that aren't good to buy and the ones that are good to buy and the ones that are really beneficial. 

The best thing about this class here, the Canon Boot Camp, is the fact that it's taught by industry professionals, who have hands-on experience in actual settings. So they aren't going to just teach you the finer points you are going to find on a piece of paper. They're going to teach you about real-world experiences. And I think that's the most valuable experience you're going to get out of a class like this. It's a small classroom with an awful lot of personable people and they not only teach you how to use the piece of equipment but why you'd use the piece of equipment. It's invaluable to me.

I would definitely recommend this boot camp to everyone out there in this field whether they are pro or amateur. It's going to make you feel comfortable with your piece of equipment. It's going to dispel any kind of fears that you might have of using it; I know I was always worried about tweaking a setting and messing with my camera because then I would never get it back, and it would be destroyed. This took all those fears away from me.

Garrett Warren
Stunt Coordinators and 2nd Unit Director


The DVTec Shoulder Rig gets a Workout by Garrett Warren

The DVTec MultiRig gets a Workout by Garrett Warren from The Association/Canon Boot Camp on Vimeo.


Garrett does something not many of us would do with our beloved Canon HDSLR cameras.  He puts them in the middle of MMA fights, goes on high-speed car chases, drops them, crushes them and blows them up.

We had the pleasure of having one of Hollywood's most sought after Stunt Coordinators and 2nd Unit Director, the charismatic Garrett Warren, at our August 2012 Canon Boot Camp. He is definitely no stranger to filmmaking, but instead of opting for cameras such as the Epic, he came to our Canon camera classes to learn how to achieve a filmic look with Canon HDSLRs.

In his line of work, the lighter the camera, the better.  I don’t imagine myself leaping from building to building any time soon, but if I were to do so, I imagine I would prefer to have a lightweight Canon HDSLR to a RED under such circumstances. 

To make his job easier, Garrett was introduced to, and subsequently fell in love with the DV MultiRig. He wasted no time in strapping it on and taking it for a turbulent test drive, which you can witness in the video. The beauty of this rig is that it becomes an extension of the shooter’s body, which is probably why it was hard to get Garrett to let go of it! Luckily, our friends at EVS, who turned us to this remarkable rig, have it in stock, so we can stop fighting over it now. 


You Don’t Need to Be Rich to Promote Your Indie Films

You don’t need to be rich to promote your indie flick.

For those who love filmmaking but don’t have an endless supply of cash, there are other options. Now, just for full disclosure, I’m not personally a filmmaker. But I am good at creating visibility online, and I work with a film and video production company. So I’m in the industry, but I’m not in it the same way a filmmaker is in it.

What that means is I’m not “stuck” in the problem the same way a starving filmmaker might be, so I can offer a different perspective. But I’m around filmmakers enough to be aware of the promotional issues and lack of cash that can accompany producing your own film.

Let’s face it, filmmaking is an expensive proposition any way you look at it. Just the equipment alone is pretty pricey. No point in making a crappy looking film, so compromising on the right look isn’t an option. Fortunately, Canon DSLRs are paving the way to reducing these costs, and they are closely followed by innovators in lighting and rigs.

By actual calculation, The Association determined that using Canon DSLRs allowed us to reduce filming costs by up to 85%. That’s a pretty sizable reduction. Not only are the cameras a lot smaller (requiring less people to handle them) but since Canon DSLRs can use available light, it requires less equipment for that great shot.


Shooting by Candlelight from The Association/Canon Boot Camp on Vimeo.

When lighting is required, LED lights are leading the way in reduction of heat, size and cost. We’ve started using Zabolights in our Canon HDSLR camera classes and their quite friendly in all aspects. Stay tuned to our blog for future demo videos on Zabolights.

But back to promoting your films. I’ve written about blogging before, but it bears repeating. No matter what you are filming, there’s an audience out there that’s going to like your work. And be willing to donate or pay for tickets or whatever. Exactly how you end up interacting with that audience is up to you and them, but if your film, your work or you never make it in front of that audience, you won’t be able to interact.

Blogging is hands-down one of the most inexpensive and best ways to get in front of any audience. Why? Because everyone who’s online knows how to use Google to search! And they are there searching for you already, but if your work isn’t represented online, they’ll never find it.

It takes time (start early!) but once you build up visibility, you’re in! There’s no waiting for someone else to approve you or give you link karma, it’s just you and your words. Without getting super technical, there’s only a few things you need to do to achieve success in the online arena:

  1. Blog daily, 150-500 words. About anything is better than nothing.
  2. Be yourself, write about things that interest you, keep it real. Communicate your passion.
  3. Blog daily.
  4. Blog daily.
  5. Did I mention blog daily?

If you did nothing else but blog daily, you’d win eventually.

This is because most sites that compete for that first page of a Google Search blog often, but only a small percentage blog often or daily. Every blog post is a “page” to Google, and the number of pages a site has is a huge factor in showing up at all. If you blog unique, relevant content that other people interact with, Google will love you and include you in their search results. Eventually you’ll make it to the top.

Is there more to know about blogging? Of course. But it’s pointless to learn more if don’t master the discipline of blogging daily. That’s the hard part, but it gets easier if you just do it. And Do it. And Do it.

For a 45 minute primer on how blogging and online promotion works (in basic terms), check out my free video.

Got some tips of your own? Please share in the comments below.


Green Screen and the Canon DSLR 5D

CBS Assistant Camera @ the Canon Boot Camp from The Association/Canon Boot Camp on Vimeo.

Nearly a year ago we wrote about using a DSLR to shoot green screen, and how it works really well. This year we have a followup clip with Meggins Moore, Canon Boot Camp Graduate, sharing her experience in learning how to shoot green screen with a Canon DSLR. 

It does just fine.

If you'd like to learn how to shoot green screen with a Canon DSLR 5D, come to the Canon Boot Camp and get your hands dirty. Our Canon Boot Camp is the longest-running workshop of it's kind, and it's the kind of instruction that exceeds expectations. Still photographers, amauters, industry pros and students have really enjoyed the process we take them through to get up and running with speed and skill on these industry-changing cameras.

For the rest of the year (and January 2013), win a seat at an upcoming boot camp by participating in our Facebook Contest. Just Like our Facebook Page, sign up for the Filmmaker's Notebook newsletter (that's how we'll announce the winners) and select the months you'd like to win. On the 15th of every month we'll pick a winner.


Teamwork at the Canon Boot Camp

Oklahoma University FootballMy husband and I love football. As ardent OU fans, we faithfully cheer on this team from our native state, Oklahoma, in every one of their games from our L.A. living room.Watching our Canon camera classes take place is a lot like watching football. No, nobody tackles anyone at the Boot Camp. I’m talking about teamwork.
At the beginning of Canon Boot Camp Pro Level 1, each attendee is partnered up with another attendee. The two of them become a tiny team, working together on all the drills and activities.

Since the Boot Camp is based on “active learning,” these little teams of two have lots of hands-on tasks to tackle together. At the end of Pro Level 1, all the attendees are familiar with their camera, and can now use it to shoot a video.

The next day, we go in to Canon Boot Camp Pro Level 2. This time, the attendees are divided into two or three teams—the Red Team, the Blue Team, and so on—and we make a short film, using the camera to shoot scenes from a short script.

Each person on each team has a camera and is responsible for shooting the scene from a specific angle. This is where the real teamwork comes into play—you must make sure that one of your teammates is not in the shot and that all angles are covered. The teams always work together beautifully, with each member helping his mates get it right.

Our students often comment on how they feel like they’re part of a team, and they are, of course. Unlike football, at the end of the day, all our teams win. Teammates often become friends, the shots turn out great, and it’s all great fun.

Maybe it’s time to develop a Canon Boot Camp cheer . . .


DSLR Filmmaking & Lenses: What You Should Know Now – Part V: Telephoto Lens

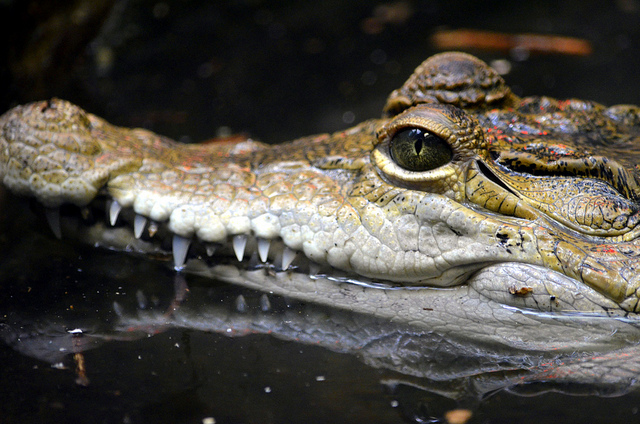
Croc

Part V: Telephoto Lens

This week features a series titled: “DSLR Filmmaking & Lenses: What You Should Know Now,” a series of blog posts explaining the importance and benefits of specific types of camera lenses (ultra wide, wide, normal, portrait, telephoto) by contributor Jeff Bauer

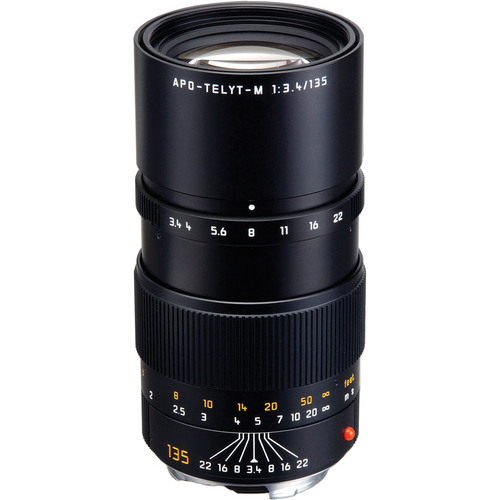
A telephoto lens is a very specific type of long-focus lens between 135mm and 300mm on a full-frame camera sensor. Inside these lenses are telephoto groups, which are sets of lenses arranged to extend the path of light through the lens, and into the camera. These groups also help keep size and weight relatively smaller than without them. The physical length of the average telephoto lens is also shorter than the focal length, and tends to allow less light pass through than shorter focal length lenses.

Lenses at this length typically have an extremely shallow depth of field, while also producing a flat or magnified image.  This isn’t always the case though. It has more to do with the distance at which you are shooting and the distance of the subject from the background, not as much with the actual perspective. This affects both the relative size and distance of objects and backgrounds, causing them to appear similar in size despite the long distance between them.

Telephoto lenses have a very narrow field of view, ranging from 30 degrees to less than one degree. So because of their long length and usually slower apertures, telephoto lenses are perfect for events such as sports and wildlife. For subjects to appear in focus, the distance between the camera and the subject must be farther away than with smaller, wider lenses. 

The slower apertures associated with Telephoto lenses allow for more of an object to stay in focus, but due to it’s long length that area in focus could still be as small as an inch. There are also minimum distance issues to be aware of, so being in a stadium for example, or filming outdoors, is going to be easier and result in a more flexible shoot. It is not recommended to use long telephoto lenses indoors unless the location is big enough to accommodate the minimum focus distance.

When using these long telephoto lenses, it’s important to take into account your ability to keep a steady hand. With such a long lens, even the slightest movement will cause blurring and shakiness, so it’s recommended to use a monopod or tripod to keep a nice steady shot. Being on average much larger and heavier than shorter length lenses, this can also effect the balance of your camera. For example, a 50mm or 85mm lens will balance much more evenly with your camera body due to it’s more compact size, but mount a 200mm lens and I guarantee you will notice how much more front heavy the camera is. This heaviness can be tiring after a long day of shooting, especially if you don’t have something to steady the camera. 

                                                Leica 135mm

Overall I love a good telephoto lens. I think most people photograph better at longer focal lengths and from long distances, you can achieve beautiful landscapes as well. These are difficult lenses to work with, but once you know the limitations and the compromises needed, you can achieve stunning results.

If you liked my series, “DSLR Filmmaking & Lenses: What You Should Know Now,” please send us feedback and suggestions for other ongoing articles. We want to hear from you and your experiences!

Also don’t forget to check out our Facebook page for a chance to winning a free Canon Boot Camp!  It’s as easy as going to our Facebook Page and clicking on the “Win a Canon Boot Camp” tab. Good luck and hope to see you there.