Monthly Archives: October 2012

Fine Art Photographer Ray Carns Becomes a Filmmaker

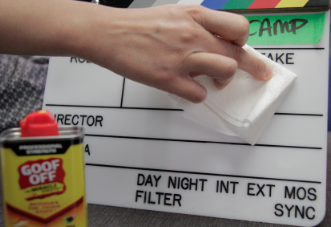
Ray Carns’ Experience at the Canon Boot Camp

Ray Carns is a Fine Art Photographer who attended our special boot camp at the Palm Springs Photo Festival in April 2012. Ray worked alongside a dozen other still photographers to soak up our signature Canon training for 5D, 7D and 60D filmmakers. Here’s what Ray had to say about The Association’s Canon Boot Camp, the longest running Canon camera class of it’s kind:


Fine Art Photographer Ray Carns at the Canon Boot Camp
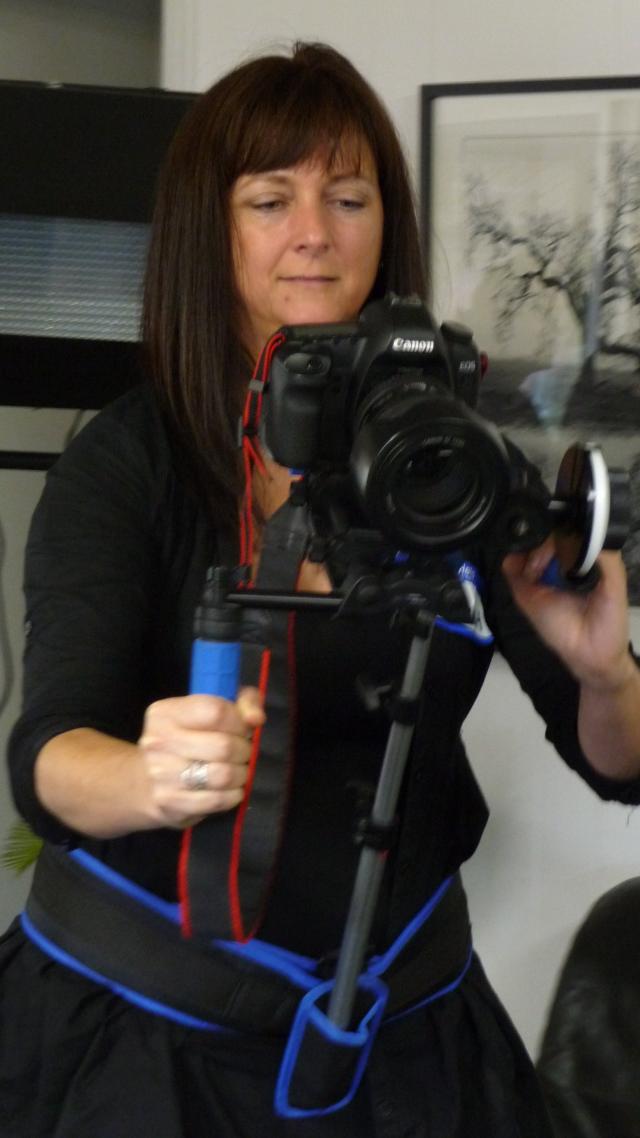
I’ve just recently started getting into digital within the last couple years, and a lot of things are moving towards multi-media, videos; and I have the camera that’s supposed to be able to do all this, so I needed to learn how to do it. I learned all the basic steps to set up my camera so I could shoot video, and then actually got to use hands-on experience out of it.

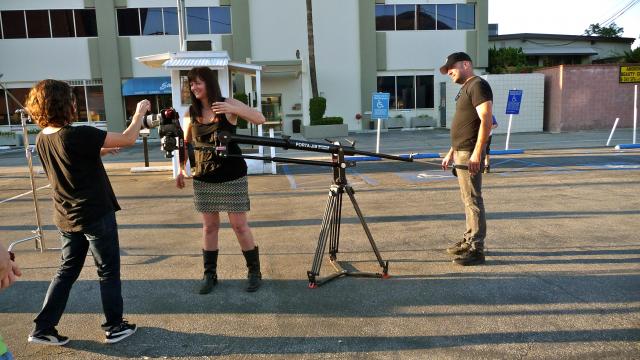
I also didn’t think we were going to shoot a short film either. I thought, you know, we were going to learn different aspects and how to use it hands-on, but then not really have something that would turn into a finished product.

I would definitely recommend it for anyone that’s interested in getting into video or even if they’re just thinking about “what are the possibilities?” I think this is great, and that’s why I’m here.

Ray Carns
Fine Art Photographer


Goodbye Light Meter

Eric Schmidt, DP Visits The Association’s Canon Camera Classes

If you are coming fimages
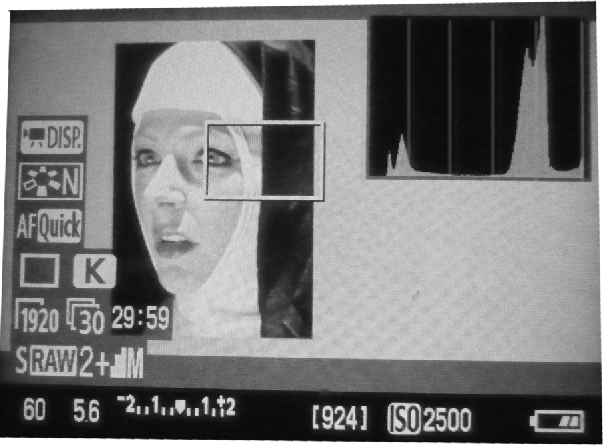
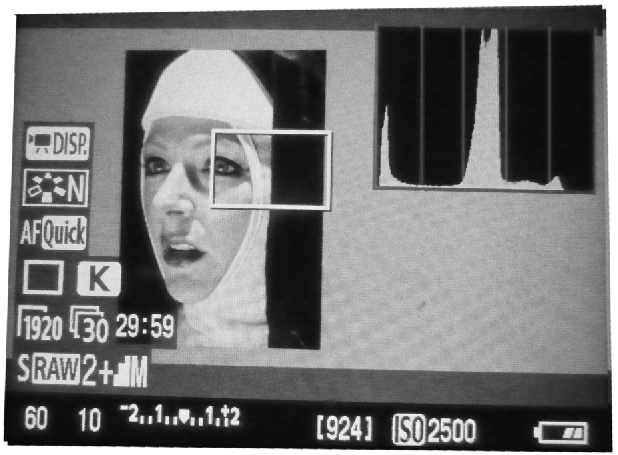
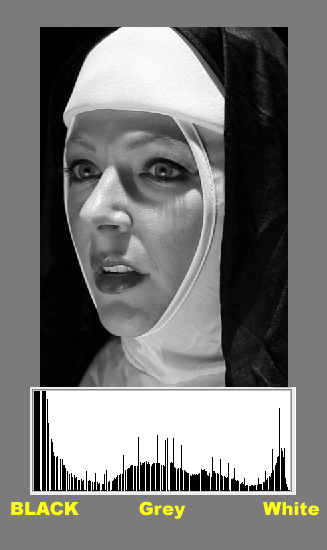
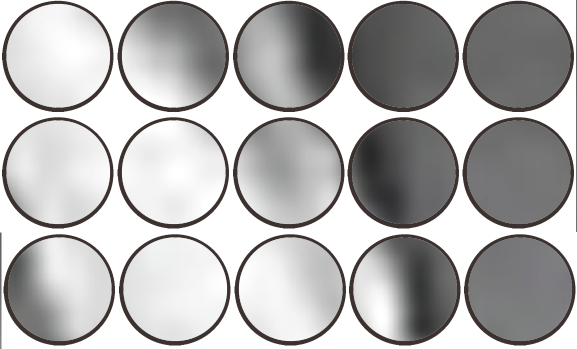
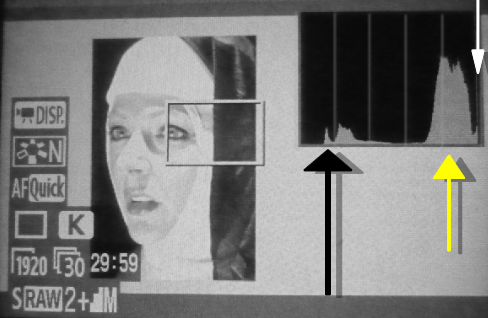
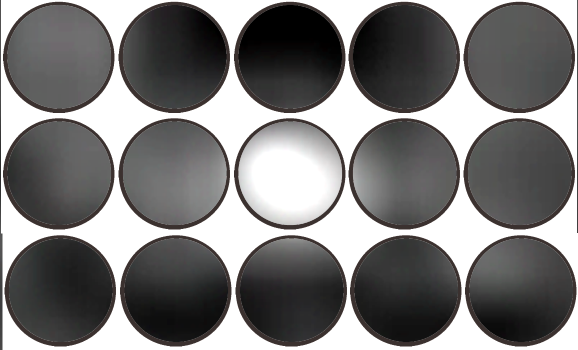
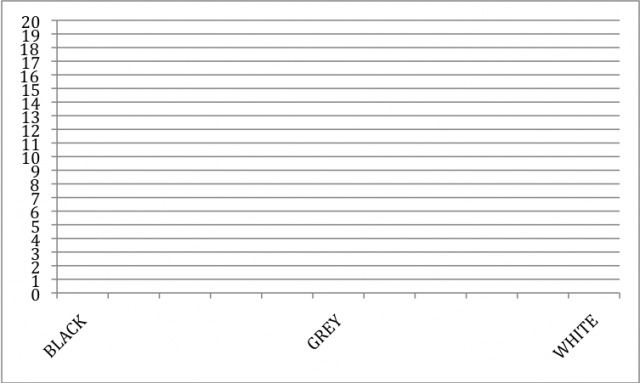
rom a film background, chances are that you are very attached to your light meter and perhaps have backups upon backups. In the DSLR world, DPs have been familiarizing themselves with the histogram in the camera to measure the accuracy of their exposure and the balance of the blacks, greys, and whites in the picture. What they are aiming to do is avoid blowing out the highlights in the picture where information would be irretrievable in post-production.

When looking at your histogram, the white spikes on the right side should never be slammed against the edge. This ensures that the detail in the whites will be retained and leave you more to work with down the line. Because once it’s gone, it’s gone.

Many seasoned DPs may have trouble letting go of the trusty sidekick they’ve had with them their whole career. It can be difficult to transition from a light meter to an in-camera tool to judge your picture. Now you’re expected to trust a digital graph to tell you how your exposure is? Eric Schmidt, Director of Photography of films, music videos, and commercials (surely, you’ve seen the Dos Equis ad), had to learn to trust the histogram while filming a feature film on the 5D Mark II with Mark Pellington. In “I Melt With You“, the shots are 100% Canon HDLSR footage and the exposure was judged by a histogram.

histogram

Above is an example of a properly exposed histogram where the spikes depicting the whites are not up against the wall of the histogram, therefore retaining detail. The grey spikes in the middle depict the skin tone of the actress. The black spikes are up against the left wall and therefore “crushed”, yet they manage to still retain some detail on the fabric.

During his visit to the Canon Boot Camp, Eric talks about his fears of the histogram and how he came to embrace it.


It’s Your Turn to Win a Canon Boot Camp!

Sarah Waters of Portland, Oregon is the lucky winner of the first “Win a Canon Boot Camp” competition! How many hoops did she have to jump though to win this rigorous competition? How many applications did she have to fill? How many videos did she have to submit? The answer is none. All she did was “like” us on Facebook, sign up for our newsletter and select the Canon Boot Camp event dates that fit her schedule.

Sarah is a still photographer who was looking to incorporate moving images to her photography business. She came to our Canon Boot Camp to learn about the 5D Mark II, and although she was worried about her knowledge of her camera, she was not left behind. She states: “I was able to learn a lot more and really fine tune a lot of things I’ve been wondering about and trying to and figure out on my own, but I was able to come here and get my questions answered.”

Sarah_rigSarah_glider

Sarah mastering a custom-made rig                  Using the glider for a controlled movement

New month, new winner. There are new hopefuls this month vying for a spot in The Longest Running DSLR Workshop in the World. Could you be our next winner? Enter for a chance to win and learn things about the Canon HDSLRs you didn’t even know you needed to know! We’ll go over the menu setup, practice drills, white balance, reading the histogram, options for audio, lighting, and more.

Plus, you’ll meet some great people!

Jib

Setting up the Porta-Jib for a green screen shot

Notes from the Manual: Histograms Part V

Understanding Histograms: Part V

Excerpt from the Canon Boot Camp Manual


Stopping Down the Exposure

The shot below shows what happens if we “stop down” the iris. All the values have moved to the left. We still can’t tell if the whites are blowing out because they are “squashed up” against the right side.

Stopping down the iris

Putting the skin tones in the middle.

The shot below shows the exposure most Hollywood DPs would like.

Getting skin tones in the middle of the histogram

The WHITES are well away from the right, GREYS (skin tones) are in the middle, and the BLACKS are squashed up against the left side. We’re probably losing information in the blacks but judging from the blacks in the picture, that’s okay. Setting the correct exposure requires judgment. Sometimes you want to “keep” the blacks (move the blacks away from the “wall”. Sometimes you want to “blow out” the whites. Sometimes you want to “keep” the whites. Below are some more examples of situations where you might want to keep the blacks or blow out the whites.

REVIEW

Below is the complete nun photo. The “histogram” we inserted is the type used in Photoshop.

A Well Exposed Nun Photo with Histogram


We can see the well-exposed picture has retained detail in the WHITES (the whites are not squashed up against the right.


The SKIN TONES are mostly in the middle.


The BLACKS are squashed but she’s in a black habit in a black room, so that’s just what we want.


Download the full Canon Boot Camp Reference Manual from our Facebook Page

Pro Photographer Gloria Baker & The Canon Boot Camp

Gloria Baker's Experience at the Canon Boot Camp

Gloria Baker is a New York based photographer with considerable experience. Her 20 year career includes a client list spanning AIG, American Express, BlackRock, CR Bard, Fortune Brands, General Reinsurance, KPGM, Louis Dreyfus Group, New York Life, PwC and Pfizer. Gloria attended the Palms Springs Photo Festival and included the Canon Boot Camp in her agenda. In one weekend she updated her digital filmmaker skills and brought them to the next level. Her review of the Canon Boot Camp follows:


It exceeded my expectations and I thought the people were very professional. I was stunned by the amount of technology and equipment that we had at our disposal. Because, I've been at seminars before where I felt like the money was not well spent. I did not at all feel that way in this workshop; I felt like it was worth every penny. I was very happy that I did it. I feel much more comfortable working on a video project at this point than I did before I took the class.

Your class approaches different levels, and I think even if somebody is even relatively experienced, which we had some people in the class who were very experienced with video, and they still contributed a lot and learned a lot. You made a lot of different kinds of people with different backgrounds and different experience levels feel like they were contributing. And I think you really were good about that. And I think that's a special aspect.

Gloria Baker
Still Photographer, NY
 

Want a Clean Slate?

Clean your Clapperboardimages

After all these years we’ve got a clean slate.

In video production and filmmaking they usually hold a slate (clapboard) up in front of the camera to identify the scene. They “clap” the board of the clapboard after identifying the scene and the director shouts, “ACTION”.  Word has it that Clint Eastwood doesn’t yell action but says, “Whenever you’re ready.”

Anyway, for years we had dirty slates.  They never seemed to clean off the last scene’s information.


Remaining image on clapperboard after cleaningWriting on acrylic clapperboard before cleaning


The slates are made of acrylic. So, last week, to celebrate Oktoberfest, we bought a new one.  We picked up the dry erase marker we’ve been using for years on the slates and when we went to wipe it off, we saw the same after image.  We couldn’t get it out with window cleaner, soap, green cleaner etc. etc.

Then we noticed that on the dry erase marker we’d used for years there was some fine print – “Indelible if used on clothing and porous materials.”  

Indelible on porous material warning.


Aha! So we’d been using the wrong Dry Erase marker all these years.  Other dry erase markers, made by the same company with the exact same brand name had no such warning.

Indelible, Dry Erase Marker on top. Dry Erase Marker on bottom.

So, how do we salvage our brand new clapboard?  It turns out that “Goof Off” took the after image away completely.

Goof Off

HOWEVER, it will also dissolve the paint filling the etched words on the slate – “Director”, “PROD.” etc.  So be careful.  You may get a slate that’s cleaner than you wanted….which would be a refreshing change for Hollywood.

(We did contact Sanford, the maker of EXPO markers, to see if they still make the indelible on porous materials dry erase marker.  We’ll report back what they said.  Stay Tuned.)

Notes from the Manual: Histograms Part IV

Understanding Histograms: Part IV

Excerpt from the Canon Boot Camp Manual

Blown out whites Whites and Grey Whites

We’ve zoomed into the nun’s cowl by her temple. (see below)

Blow out whites, white and white greys pic 1

Blow out white, whites and white greys Pic 2

Some pixels are reporting grey/white dots and some darker shades of grey, but none are completely blown out (“whiter than white”) and none are black-black. This is a sign of good exposure, i.e. no blown out whites. There is some black in the picture.


Draw the histogram for the picture above:

Print off the picture below, and try your hand at drawing in the histogram for the picture above.

Blown out whites, whites and white greys

Blown out whites go off the histogram.

Below is an example of the nun’s picture overexposed, i.e. blown out whites. This is how the histogram looks on the 5D (and 7D). There are six faint white lines running vertically across the histogram.

Example of blown out whites going off the histogram

WHITES – The far right line (white arrow) is the edge of the histogram display. If values go past this point they disappear off the graph. They are “clipping”, which means there is no information…. just whiter than white. All detail is lost past that point.

The histogram squashes blown out whites up against the right side of the graph. (see white arrow). You can’t actually tell how much data you’ve lost. It just disappears off the graph and shows you a very thin spike along the edge.

GREYS – The greys of the nun’s skin tones are indicated by the yellow arrow. They are much too far to the right (over-exposed). Skin tones should be closer to the center of the histogram.

BLACKS – Also, see how the blacks (see black arrow) have moved away from the left edge of the histogram. In this case.the blacks won’t appear black but are “milky black”. The nun’s black robes won’t be black but dark, milky grey. Milky blacks are not good.

Download the full Canon Boot Camp Reference Manual from our Facebook Page

Notes from the Manual: Histograms Part III

Understanding Histograms: Part III

Excerpt from the Canon Boot Camp Manual


What each pixel “sees” and reports.

Now we’re going to zoom into the picture below with our 15 pixel camera. We’re going to see what light value each pixel “sees” on a tiny bit of the picture. This is the value the pixel reports. These reports are grouped and built into a histogram.

Zooming in on what the pixel sees Pic 1

Zooming in on what the pixel sees Pic 2


Zooming in on what the pixel sees Pic 3

Zooming in on what the pixel see Pic 4

Zooming in on what the pixel sees Pic 5

Below is what our 15 pixel sensor sees of the picture above.

What the Pixels see

There are pixels that are mostly black and some “black/grey” to “dark grey” and one pixel that is closer to white but not white white….not 255 on the histogram.

DRAW what value each pixels on the sensor ”sees”. In other words, count the nearly black pixels and draw a column representing them. Count the “darker blacks” and draw a column of those. Count the pixels reporting “white” values and draw a column of those. Count the grey values into groups and draw a columns of those groups, i.e. milky black, black grey, dark grey, Or name your own groups and total the number of pixels in each group.

Draw your own histogram


Download the full Canon Boot Camp Reference Manual from our Facebook Page