Author Archives: Cine Boot Camp Team

Notes from the Manual: Chroma Subsampling and DSLR Color Space

COLOR SPACE

Excerpt from the Canon Boot Camp Manual

Another problem the Canon engineers faced was whether to have the 5D record movies in 4:4:4, 4:2:2, or 4:2:0 color space. Actually, since they weren’t planning to redesign the whole camera, 4:4:4 files would have been too big for the 5D.

Again, the engineers worked backward from what the eye could see. AND the size of the screen the audience would be looking at, i.e. a High Def TV screen.

So, they set a realistic goal, rather than a goal of ultimate perfection that would make a camera too big for the Associated Press, and make its output so data heavy you’d have to buy a whole new computer to edit it. They took a practical approach to achieve AP’s goal.

So, (we think) they decided on 4:2:0. Why? Because it saved a ton of data storage and most of us can’t tell a difference once 4:2:0 is upconverted to 4:2:2 Pro Res.

Below is a link to a video explaining the concept of color space and how it works.


Download the full Canon Boot Camp Reference Manual

from our Facebook Page

Polly Morgan DP and The C300 Crash Course: Part 1

Canon C300 When we got a call asking for a 1-on-1 C300 course, we brought in Polly Morgan, who was the DP on “Mobius.” “Mobius” was commissioned by Canon and shot on the C300 for the launch of the cinema camera.

When Polly shot “Mobius”, the C300 she used was a prototype, so the buttons were not even labeled. Luckily for us, Mark brought a C300 with properly labeled buttons! Phew.

Here are some tips from Part 1 of the “C300 Crash Course”

1. Color Space: Know where your piece will be shown. If your work will be shown on TV, or on the web, you do not need to shoot in a 444 color space. As Polly mentions, TV’s color space is Rec. 709 and all the extra information from a 444 source will be wasted. However, if you are doing Visual Effects, this is where a 444 color space would come in handy.

2. Beware of making adjustments that would give your footage a harsh, digital look. However, adjusting your Gamma (contrast), and Color Matrix can help you create a filmic look.

3. Polly’s personal preference for the Sharpness setting is -2.

4. When setting your Color Matrix, pay attention to the way the colors are digitally replicated. Yellows may lean toward a mustard tone, while some blues may seem more purple.


Interested in having your own private Canon Boot Camp? We realize not everyone can fit our schedule into their production time frame. If we can possibly accommodate for a private one-on-one Canon camera class, we will! Just give us a ring or send us an email.

Filmmaker Gets a Grip on his Canon DSLR 5D Mark III

New Digital Filmmaker Learns the Canon 5D Mark III

Pablo Lewin learns DSLR Filmmaking at the Canon Boot CampI had been looking forward to taking this highly praised DSLR Bootcamp for a while. I have been a Filmmaker for 5 years (Short Films/Docs/Music videos) and having just purchased a Canon 5D Mark III, needed help learning how to use it. Since I travel all the time,  The Association (with the help of the highly capable and professional Celine) was able to schedule a one on one with Fletcher Murray for the Pro Level I portion. A week later I came back on the scheduled day for Pro Level II.

On Day two we all applied our recently acquired technical knowledge filming a narrative short film with professional actors and a bunch of “camera operators” (Boot Camp students with their cameras) at four locations, including mounting the camera on a car and an old cemetery in Altadena.

They did not disappoint. Mr. Murray is a filmmaker with decades of experience and a natural teacher his explanations were clear, informative and delivered promptly and good naturedly. Suddenly the 5D was no longer a stranger, but a trusted friend. Throughout I and the rest were treated kindly, patiently and most importantly PROFESSIONALLY. I highly recommend this bootcamp for those like me who are new at DSLR filming or old hands in need of refreshing their shooting skills.

Pablo Lewin
Pablo Lewin Productions LLC
Glendora, CA

Notes from the Manual: Why Hollywood D.P.s are Excited about the Canon 5D

What got Hollywood’s D.P.s Excited about the Canon 5D

Excerpt from the Canon Boot Camp Manual


The main reason was that it had a big sensor, so it can deliver a very shallow depth of field (depth meaning how much of the picture is in focus).

Shallow and Deep Depth of Field

So the BIG DEAL was that most video cameras had such small sensors that almost everything was in focus (like the picture on the right above). But the Canon 5D sensor is huge. It was the first to deliver that shallow depth of field that could focus just on Hugh Laurie’s right eye and put the other eye out of focus.

Hugh Laurie's in focus eye shot

One inch depth of field.

SHALLOW depth of field—that’s the BIG DEAL.


Download the full Canon Boot Camp Reference Manual

from our Facebook Page

Tips on Backing Up DSLR Camera Footage

Ron Howard and Project Imagin8tion colloboration with Canon

So you’ve gone out and shot your masterpiece! Congratulations! Now it’s time to get that bad boy off the card, into your computer, edited and on its way to a festival.  Sounds simple enough, but one of the things I’ve learned over the years is that if something can go wrong, it will go wrong at some point. The smartest thing to do is be prepared for such a scenario. There’s nothing quite like the rage that builds inside of you after finding out that footage is missing or is corrupted, but it’s even worse when you could have done something to prevent it. That’s why I’ve put together a quick list of important information relating to backing up your footage and the steps you can take to secure your data.

While it’s nice to have a dedicated person on set like a data wrangler to take care of your footage, there isn’t always a budget for such a specialized position, so for the independent filmmaker, that person is typically you. It’s usually a good idea to have your computer on set so you can transfer video right away. A quiet place is nice, but don’t wander too far away from set. I had a laptop stolen once because of this and I learned the hard way to never let the computer out of my sight. Setting up a computer on set caries the advantage of actually being able to check footage beforehand and not have to wait to get home to find out it’s corrupted. 

Once you have the computer set up, copy the files over in the exact file structure it is saved as. I recommend creating a master folder and a sub folder for each particular transfer. Now this is extremely important; if you change the name of any file, or forget to include any documents included on your card, your footage will not work.                                      

Mac Hard Drive Set upOnce you’ve transferred a copy of the card, check the footage in a program such as Quicktime or VLC to see that it is playing properly. This depends on the codec you are filming with, so use an appropriate program. Finally, duplicate your footage to another hard drive or flash drive and move it away from the film site. Technology is not perfect, and people make mistakes, so just in case something happens to the original footage, you have it backed up nice and safe on another drive and in another location. If this truly is your masterpiece, I might even backup on a third drive. Better safe than sorry.

Once the footage is confirmed, you should have the card formatted. Technically  you can now erase the footage from the card from the computer, but DSLR’s from different companies use different file structures, and formatting in the camera is the best way to ensure a certain level of consistency. 

Backing up your DSLR camera’s footage is not only smart, but in most cases, essential. It’s a good idea to practice good habits now so that you don’t look unreliable when you get hired to work on that music video or feature film you’ve been dreaming of like tomorrow’s Ron Howard.

If you liked this article, check out our Facebook page and share it with your friends! For information about our extensive two day Canon Bootcamp, visit our website at www.canonbootcamp.com.

Video Production Manager Azusa Pacific University


I came here literally, just maybe knowing how to turn the camera on. And I think I left here – I can take a camera, a 7D, and actually do a shoot. I didn't know once we were shooting this with the cameras that this also showed you how to capture that footage. You don't always get that.

Karl Morgan
Video Production Manager
Azusa Pacific University


Karl arrived knowing almost nothing about his Canon HDSLR 7D. When he left, he knew how to do a proper shoot, but not only that, how to capture the footage properly for post production. After all, the shoot isn't worth anything if it never makes it to an editing bay, right? Proper digital capture and getting the finished product into the hands of a client requires knowledge of best practices, and our Canon camera classes were developed from experience on set. We know how to prevent loss because we've been through it. Come learn what you need to know at our Canon camera classes.

RAW Video File Format: Advantages and Disadvantages

Blackmagic Cinema Camera and RAW File Formats

RAW File Format

I like to think that I’m well informed when it comes to the DSLR / independent film world. I may not be the first to comment on a new product or feature, but I do try to talk about things that I think are relevant to the community. Personally, I like to think of myself as a filmmaker, a writer, and a director, but at the end of the day, I’m really an artist. So like any artist, I want to make sure that I have the best tools at my disposal. If I’m going to paint a picture, I need paints and brushes to help me achieve my vision.


RED Pro 5.0 Camera
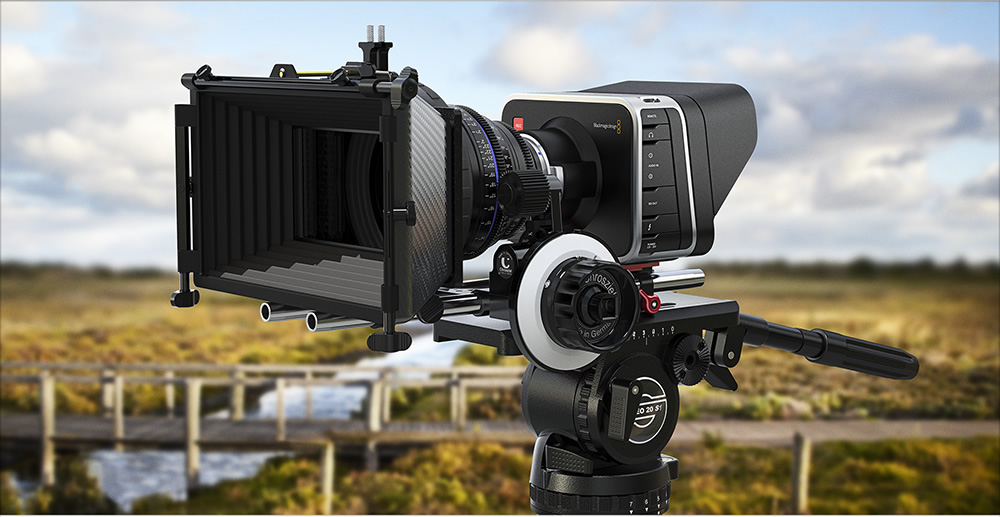
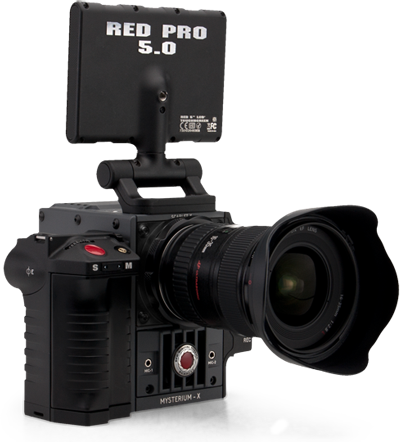
In the past few years, the RED camera has been a huge success, and part of that success has to do with its ability to shoot RAW video. Now I’ve seen how amazing RAW video is but for a while I didn’t find it worth my time because it was so far outside my own price range. It was pointless to think about; a pipe dream, a fantasy. But with the emergence of the Blackmagic Cinema camera, all of a sudden RAW video is not only attractive, it’s affordable. So affordable that it borderlines on highway robbery! So I figured now might be a better time than ever to discuss some of the advantages and disadvantages of RAW video. 

RAW Video Advantages

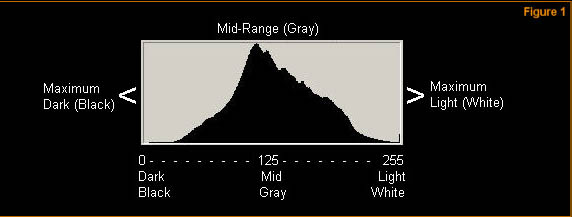
The most attractive bit about filming in RAW is the sheer amount of information that is retained in your video. The details that normally disappear in the shadows and highlights of DSLR footage is completely retained. No longer do you have to sacrifice quality in one area for another. 

Almost every DSLR shoots in an 8 bit color space with 4-2-0 sampling. This means that there are only a certain number of colors to choose from, with only a specific portion of those said colors being sampled. This is where RAW comes in. RAW video typically has a color space between 10bits and 16bits and a sampling of 4-2-2 or 4-4-4-4; which is useful information, but that’s not what RAW file format really means. I’m not going to go into details, but it effectively means that you can capture a huge range of colors and information, and expose your footage in post. You technically have the flexibility to change the way your footage behaves after you film it. It’s much like shooting photographs in RAW. You retain a wide range of information and use that to achieve the best results possible. It’s truly amazing what you can do when you get to color grading.

RAW Video Disadvantages

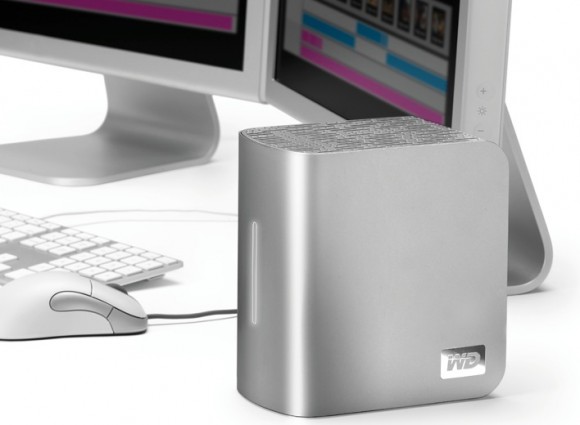
There’s really only one disadvantage but it’s a big one: Space. The size of these files are astronomical. I shot recently with the new RED SCARLET and we tore through a 64GB SSD in less than 10 takes. Want to shoot a feature length? No problem, you just might need 20TB of storage to hold it all, and that’s pretty expensive. Also think about the computer speed you will need to playback, edit, and color grade the footage. Were talking a minimum quad-core processor and 8GB of RAM. That Macbook you bought in 2009 isn’t going to do the trick. 

So no matter how amazing the footage is, if you don’t have the tools, or the ecosystem set up to take advantage of RAW video, you’re just making things more difficult for yourself. And yes, things do start to get expensive, so make sure that you’re willing to reinvest in a new computer and a lot of storage space to hold it all.

The RAW Conclusion

I love the look of RAW video. It’s all flat and pale looking at first, but the second you get into post and start color correcting it, it’s a whole new world. Colors pop, shadows and  highlights retain texture and detail, and when done right, makes a DSLR looks like a kids toy. Does that mean that I’ll be ditching my DSLR soon? Not exactly, but it’s a truly exciting time for independent filmmakers and I look forward to new technologies and innovations headed our way.
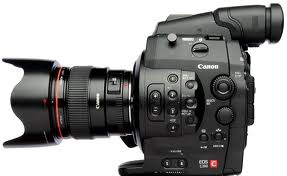
Geary McLeod from ‘The Mentalist’

I highly recommend this to anyone who is even going to dabble in this world. It's a great introduction. Digital SLR is clearly the direction a lot of work is going to go in – one of the producers from 'The Mentalist' is already  interested. So half of my reason for being here is so when he brings it up again, we can have an informed conversation.

Geary McLeod, ASC
'The Mentalist' DP


Canon DSLR Video Techniques: Evaluative Metering and Histograms

Metering and Histograms on Canon HDSLRs

When it comes to shooting video on a DSLR, there’s two easy ways to determine if your video is properly exposed. The first is the use of evaluative metering and the second is the use of a histogram. These two features together are the most accurate means for proper exposure. It’s important to use both of these features together if you want the best looking video straight out of the box.

Evaluative metering is the standard in exposure methods. Canon DSLR’s such as the 5D Mark III and the T4i use evaluative metering for exposure, and display this information in the form of a slider. The camera, much like your own eye, analyzes the entire condition of a scene and determines a proper exposure. The exposure meter, or slider, then indicates where you currently stand in relation to that number. If underexposed, the slider will carry a negative position; when overexposed, a positive number. 

                                           Exposure Meter

Obviously you can try to perfectly expose your scene but it’s not always easy. Dark spots and reflections will play a factor in the camera’s final metering, so it’s recommended to meter away from these areas for more accurate metering. Having personally used many different types of DSLR’s, I prefer to shoot two notches below “properly exposed” but it’s different for each camera. I recommend going out and filming scenes in multiple environments to see how your camera reacts. 

The second way is to use a histogram. Having started my career in the television world, it was essential that we used histograms, and over time I’ve used that knowledge to get a better picture from my DSLR. Rather than using a complex camera equation to determine exposure (evaluative metering) the histogram is a visual representation of the light and dark elements of your video.

Histogram

Dark pixels are represented on the left side of the histogram and light pixels are on the right so it’s easy to see if the blacks or whites are overpowering the image. If an image is underexposed, the histogram will skew to the left, and if overexposed, to the right. If the histogram is peaking too hard in one direction or the other, you will end up losing detail. This is because the exposure at each extreme end is getting blended together, effectively crushing colors and detail. It may not seem like as big a deal in the field at the moment, but when you get into post and color grading, you will be disappointed to see you lost details in those areas.

The best method is to incorporate both tools into your everyday shooting and remember that there is no one single way to achieve perfect exposure. Some of my favorite pictures are underexposed in areas because I’m going for a stylistic choice. At the end of the day it comes down to getting comfortable with the camera and with your own artistic vision.

Want to learn more? Join us at our Canon Bootcamp, an extensive two day workshop designed to help you learn more about your camera and teach you the skills to create your own stunning visuals. You can also find out more information by  liking our page on Facebook.