Understanding Histograms: Part V
Excerpt from the Canon Boot Camp Manual
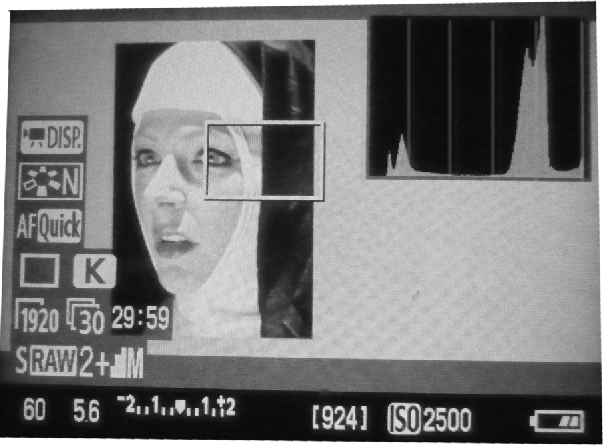
Stopping Down the Exposure
The shot below shows what happens if we “stop down” the iris. All the values have moved to the left. We still can’t tell if the whites are blowing out because they are “squashed up” against the right side.
Putting the skin tones in the middle.
The shot below shows the exposure most Hollywood DPs would like.
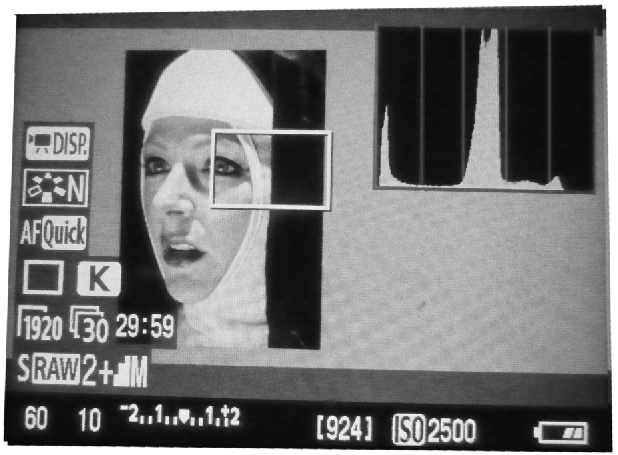
The WHITES are well away from the right, GREYS (skin tones) are in the middle, and the BLACKS are squashed up against the left side. We’re probably losing information in the blacks but judging from the blacks in the picture, that’s okay. Setting the correct exposure requires judgment. Sometimes you want to “keep” the blacks (move the blacks away from the “wall”. Sometimes you want to “blow out” the whites. Sometimes you want to “keep” the whites. Below are some more examples of situations where you might want to keep the blacks or blow out the whites.
REVIEW
Below is the complete nun photo. The “histogram” we inserted is the type used in Photoshop.
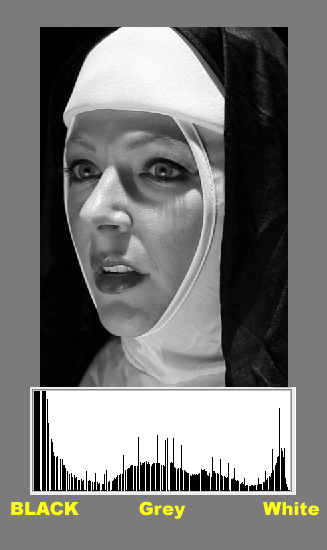
We can see the well-exposed picture has retained detail in the WHITES (the whites are not squashed up against the right.
The SKIN TONES are mostly in the middle.
The BLACKS are squashed but she’s in a black habit in a black room, so that’s just what we want.