Monthly Archives: May 2013

A Quick Overview of the C300 and 1D C with Andrew Bender

Andrew Bender is a freelance Filmmaker based in Los Angeles working on Narrative, Documentary, Commercial and Corporate projects. He rounded out the team that went to the Palm Springs Photo Festival this year to teach the Canon Boot Camp. He is a DSLR expert and an experienced C300 camera operator. Previously, he was on staff at Google for five years as part of their in house video department and had the opportunity to shoot videos all over the world including Australia, Argentina, Finland, Ireland and Mexico.

Andrew thrives on the creative and technical challenges of transferring a story or an idea onto the screen. He was kind enough to impart his knowledge of the Canon HDSLR and his filmmaking techniques to the participants at the Palm Springs Photo Festival.

andrew_bender_

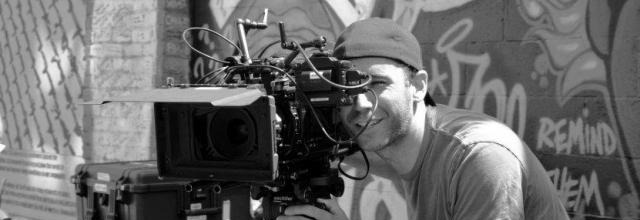
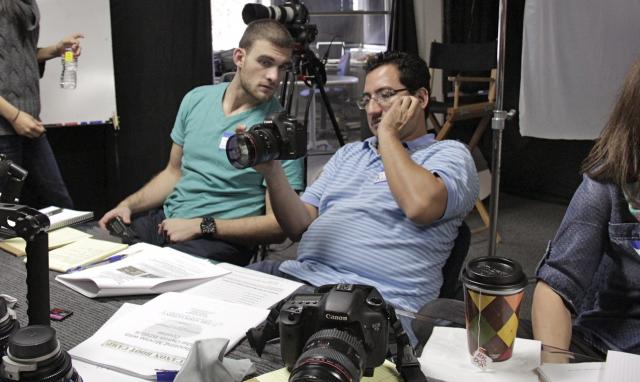
Andrew Bender: multi-talented camera guru

I asked Andrew to tell me about his first time teaching at the Canon Boot Camp. Below are his answers:


Celine: How was your experience teaching at the Palm Springs Photo Festival?

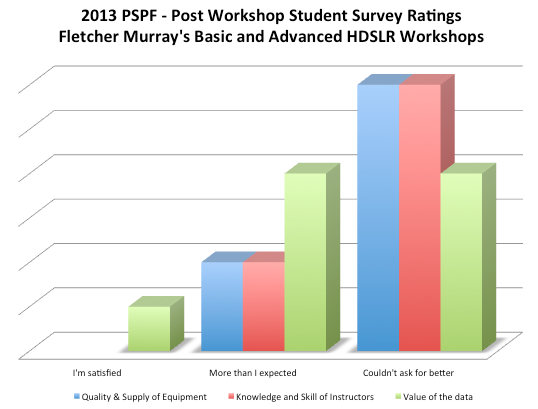
I had a blast teaching at the PSPF, it was great working with all the students who had varying backgrounds and levels of experience, hearing their questions and seeing the ideas they came up with was exciting and educational.  It was fun to have a lot of great new gear to play with from Canon.  I also learned a lot working with Fletch and watching him teach.

_mg_4998_w640

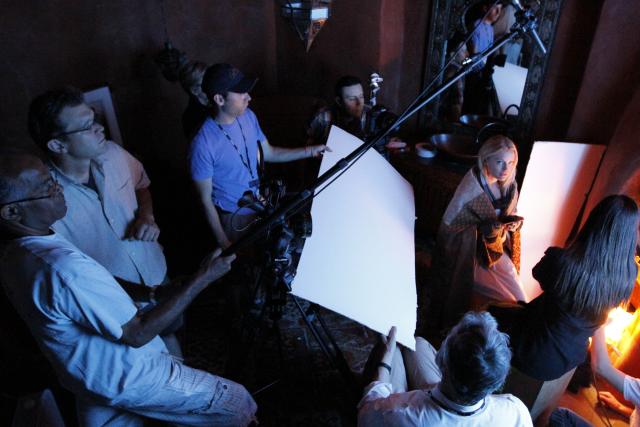
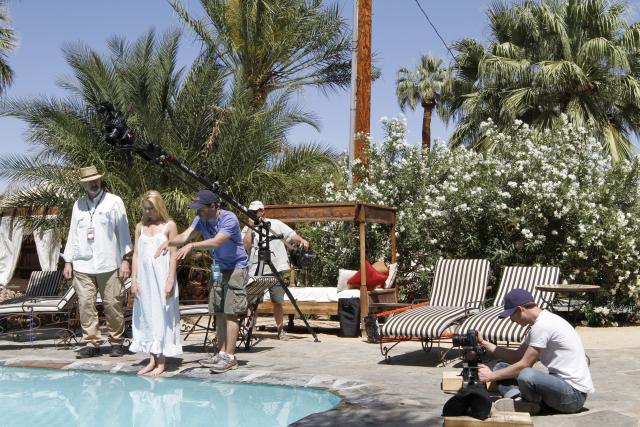
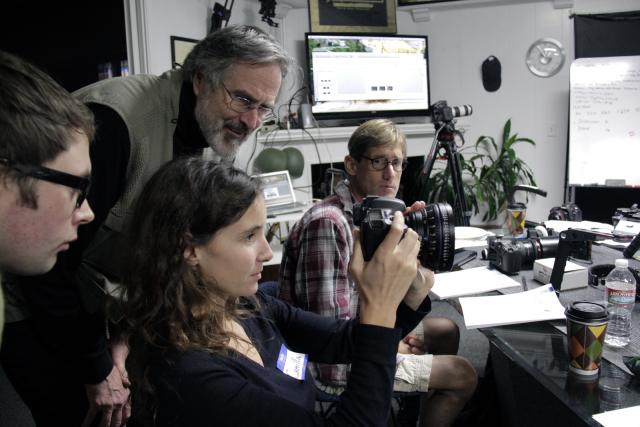
Here is Andrew using a white bounce card to help fill the actresses’ profile. 


Celine: Did you have a favorite scene?

We did an interior scene lit almost entirely by firelight.  I wanted to see how little light we could get away with and Canon was kind enough to loan us a set of Cinema Prime lenses and a 1D C, we ended up shooting close ups on the 1D C with an 85mm Cinema Prime wide open, much to Fletch’s dismay since we had less than 1 inch of depth of field on a shot where the actress was moving.  It was a good way to show the students the difference between still lenses and cine lenses when it comes to pulling focus since we were able to get some graceful focus pulls.


Celine: Yes, Canon was very nice to loan us the 1D C. Last year, they loaned us the C300! I wonder what we will get our hands on next year… Could you please expand a bit on your experience with the 1D C?

My first experience with the 1D C was at the PSPF…Canon was nice enough to loan it to me for the week, and I didn’t want to give it back at the end of the workshop.  I had been interested in it ever since it was announced and after having played with it for a few days I was even more interested in getting the opportunity to use it on a project.  The ability to shoot 4K video with a DSLR (although highly compressed) is pretty nice.  The 1D C can also shoot 60fps at 1920×1080 resolution something that the C300 can’t do.  Having Canon Log in video mode is also a great feature in the 1D C, making it possible to match it with the other Canon Cinema cameras.  Oh, and it’s an amazing still camera!
One issue I noticed was some pretty bad banding and artifacting in some video clips I had shot on the 1D C, after some research online it seems that shooting at ISOs lower than it’s native ISO of 400 can cause that problem.


Celine: What are the pros and cons of using the C300 over the 5D Mark III or other Canon HDSLR?

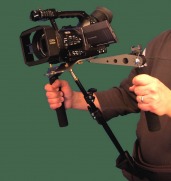
For me the pros of the C300 over a DSLR are primarily the image quality, shooting the C300 in Canon Log has more exposure latitude than the DSLRs.  The 50 Mbps MXF files that the C300 records to CF cards allows for much more creative color grading than what any DSLR can record to card.   Having XLR audio inputs, built in ND filters and a HD-SDI output are all additional “pro” features that DSLRs don’t have.  The C300s LCD that can be turned and flipped to the operators preference and the included waveform monitor and vectorscope are great features that allow you make accurate exposure and color decisions using only the onboard LCD.

For all of the benefits of the C300 it is significantly more expensive than a DSLR.  The C300 is also bigger and heavier than a 5D, so the form factor alone may make a DSLR more appropriate for some projects.

Celine: Anything specifically you’d like to point out or note about the C300?

The C300 does leave some things to be desired, particularly high frame rate recording with a maximum of only 60fps and a maximum resolution of 1280×720 for anything thing higher than 30fps.

_mg_5033_w640


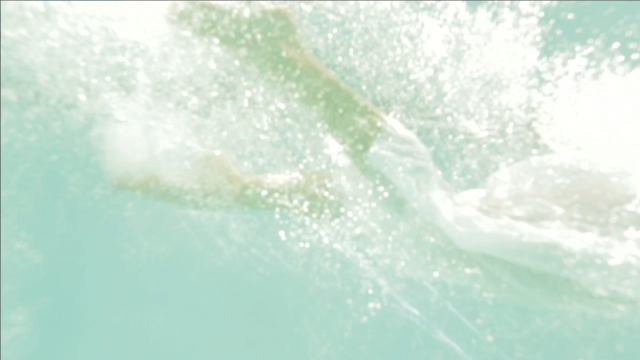
Andrew is directing the actress’ plunge into the pool for the underwater scene.

- See more at: http://blog.theassociation.tv/blog/the-association/page/2#sthash.mP5wCmNy.dpuf

Our Students “Couldn’t ask for Better!”

The Korakia Hotel

The Association just taught our second class at the Palm Springs Photo Festival for the second year in a row! This time we had the honor of not teaching one, but two classes. It included a basic class, and an advanced class. We were happy to see that one student, Ray Carns, who came to the class last year, came back this year for the advanced class! The team that went to Palm Springs this year was Fletcher Murray, Nancy Murray, Michael Brewer and Andrew Bender. The students learned many techniques, tricks and tips from these cinematographers and HDSLR experts. According to the survey we gave out at the end of the class, they were all satisfied and couldn’t ask for better! That is great news to us, since we strive to provide our participants with the most relevant and useful information in the filmmaking and HDSLR world.

PSPF Canon Boot Camp Survey Results


This year, we shot at the Korakia’s Orchard House once again. We were able to visualize new scenes in a familiar environment and use new locations such as the swimming pool for an exciting underwater diving shot. The script was written by Fletcher Murray and shows off the beautiful scenery and architecture of the Korakia Pensione hotel. Some of my favorite shots are the ones featuring the gate and inviting entry way of the hotel. The video shot by the participants who were mostly still photographers, will be up shortly on our vimeo page!


An exterior shot of the exotic hotel


korakia2

An ethereal underwater shot

Below is our video from the 2012 Palm Springs Photo Festival:

‘Escape’ – shot by workshop attendees at the 2012 Palm Springs Photo Festival from Fletch Murray/CineBootCamp on Vimeo.


- See more at: http://blog.theassociation.tv/blog/the-association/page/2#sthash.mP5wCmNy.dpuf

Notes from the Manual: Histograms Part V


Excerpt from the Canon Boot Camp Manual

Stopping Down the Exposure

The shot below shows what happens if we “stop down” the iris. All the values have moved to the left. We still can’t tell if the whites are blowing out because they are “squashed up” against the right side.


Putting the skin tones in the middle.

The shot below shows the exposure most Hollywood DPs would like.


The WHITES are well away from the right, GREYS (skin tones) are in the middle, and the BLACKS are squashed up against the left side. We’re probably losing infomartion in the blacks but judging from the blacks in the picture, that’s okay. Setting the correct exposure requires judgement. Sometimes you want to “keep” the blacks (move the blacks away from the “wall”. Sometimes you want to “blow out” the whites. Sometimes you want to “keep” the whites. Below are some more examples of situations where you might want to keep the blacks or blow out the whites.

REVIEW

Below is the complete nun photo. The “histogram” we inserted is the type used in Photoshop.

We can see the well-exposed picture has retained detail in the WHIES (the whites are not squashed up against the right.


The SKIN TONES are mostly in the middle.


The BLACKS are squashed but she’s in a black habit in a black room, so that’s just what we want.

Download the full Canon Boot Camp Reference Manual from our Facebook Page


Preparing Clients to Buy Your Video Services

Use events to close more clients for video services

Purchasing video services is often a major decision. There’s a lot that can go wrong for a lot of money. To add to the mix, in Los Angeles/Burbank/San Fernando Valley, there’s a lot of video production companies to choose from. Holding informational or training events for clients can help prepare them both to go through your video process and close them on choosing you, the expert video production crew, to produce their video.

Have you ever actually written down everything you know on video production? I’m willing to bet that, if you’ve successfully made a living at video production so far, you probably know a lot! If you know more about video production than your client, you’re qualified to train them on what you know. Taking the time to educate a client on various aspects of the video production process can go a long way in closing them on using your skills for their video. After all, you’ve already helped them by shedding light on how it all works.

Holding an event for potential clients can accomplish several important steps in closing any one of them on a video:

  • It compresses time, getting multiple potential clients in a room, out of which several paid clients may materialize (hopefully with a checkbook)
  • Potential clients get a chance to informally meet you in person, avoiding personality conflicts later and increasing chances of clients hitting it off with you. If they don’t like you, they won’t become clients, avoiding awkwardness later.
  • Assuming your event is helpful, they should come to the conclusion at the end that you are qualified to produce their project.
  • Events give you a chance to show work you’ve already done in a controlled environment (YouTube is NOT a controlled environment due to the distracting ads from your competitors
  • Inviting current or past clients to attend allows them to help you close potential clients through the group interaction an in-person event allows.


Here’s some possible events a video production company could hold for potential clients:

Navigating Video Production and Working with Production Companies

How to Plan your Online Video

10 Ways Video can Boot Sales

Tips on Choosing a Video Production Company

The Elements of a Successful Commercial


Whatever topic you choose, keep in mind the Seven P’s so that your event is successful and people actually show up! Don’t know what the seven P’s are? Proper Prior Planning Prevents Piss-Poor Performance. If events haven’t been your thing in the past, get educated on how to pull of a successful event, THEN produce it.

Producing an event won’t be unlike producing a video. It takes a team, and there’s a number of details. I’ll be writing a series of Event Tips in this blog on some of those details, so keep an eye out for the Event Tips Series. We’ve been producing our own events for several years, generating thousands of dollars a month as well as new clients and projects. You can too!

- See more at: http://blog.theassociation.tv/blog/the-association/page/2#sthash.mP5wCmNy.dpuf

Active Learning at the Canon Boot Camp

Since Day One of The Association’s Canon Boot Camp over 3 years ago, we’ve always taken the stance of Active Learning at our workshops. This means that our HDSLR workshops are very hands-on and that our students retain more information than they would have in a lecture setting.  Our students have all left the Canon Boot Camp with their questions answered. According to our surveys, the main reason filmmakers come to our bootcamp is to learn to operate the Canon HDSLRs and to become more comfortable using the camera and understanding the menus.

Thanks to our Active Learning method, beginner students who may have more questions than an intermediate student are not left behind because we answer all questions as they come up. That means that our students never fall behind by having to wait until the end of the class to ask questions. We are happy to be interrupted by a raised hand. Our student to instructor ratio is about 3:1 and our well-rounded team can answer questions about all Canon HDSLRs, lighting, sound, media management, production, and more.

Instructor ratio is 3:1 at the Canon Boot Camp

Check out this video highlighting our Canon Boot Camp:

The secret to the success of our workshop is that everyone is involved in each other’s learning experience. Not only do our instructors dish out nuggets of success, but our students become involved in each others’ education. Because we have participants of various backgrounds, they are able to provide insight into their niche and share details of what gear and equipment is most useful for them during our product demos.

This is one of the main reasons why we pair students up during drills and let the “twins” work together. They work off of each other’s strengths as they navigate through the confusing and hyper-technical menus (especially the Mark III’s. Have you seen that beast?). When they are both stuck, this is when one of us instructors comes by to guide them through.

Students learning together in the Canon Boot Camp

Our Active Learning method also includes drills that ensure the participants leave the workshop being very familiar with the location of settings, buttons, etc. This includes changing the ISO, setting a custom white balance, changing the f-stop, and more integral parts of using the camera that you’d want to remember during a high-stress situation. We train you so that adjusting these key settings becomes second nature. Having gone through years of schooling, I wish more of my classes were taught in this manner.

I always found that I learned best when teamed up with classmates. It especially breaks any tension of feeling like I am in a room full of strangers. One thing I notice from our boot camp is how quickly everyone becomes friends. If we just handed out a packet and told the students to follow it and listen to Fletch talk for 6 hours, about half the class would be asleep by the time we got to Histograms.

The interaction between students keeps the class lively, active, and productive. All the positive energy helps everyone learn better because they are very comfortable asking questions and don’t hold back helping one another since they know after our introduction exercise that everyone is here for one reason: to become a better filmmaker.

All of our students happily complete the course achieving their goals of learning to operate their camera, becoming familiar with the menu, and therefore becoming more confident as filmmakers.

Students participate in the Active Learning process


- See more at: http://blog.theassociation.tv/blog/the-association/page/2#sthash.mP5wCmNy.dpuf

Invest in Yourself

Canon Boot Camps: Invest in your filmmaker skillsThe only way to land bigger and better film jobs is to increase your skillset as a filmmaker. Whether that means reading blogs, conducting your own camera tests, trying out equipment, taking workshop classes, or spending hours on online courses, it’s up to you. In order to become better, we have to improve our toolbox, literally and figuratively.

One of the best thing I did for myself, after I graduated from college with the goal to work in production, was to invest what little money I had into a Canon 7D. I had never used a digital camera, but the Canon HDSLRs were becoming very popular, so following the lead of a mentor, I purchased the 7D camera kit. I went on to a trip to Asia to start gathering b-roll on a documentary I am still planning to film and produce. I was basically shooting blindly as I did not know much about controlling the camera. I’m pretty sure I was on auto during the entire trip. Still, having the camera put me in charge of capturing some beautiful scenery.

Celine Duong, Canon Boot Camp Instructor, Former InternWhen I got back, I started volunteering on shoots that needed a Canon HDSLR. Once there, I slowly got the grasp of how DPs set up their cameras for different scenarios. They would tell me what ISO to set my camera, what f-stop, etc. I learned so much from these small jobs and started getting hired as a freelancer. I credit this camera for getting my career started. It also got me hired as an intern at The Association since Fletch was and still is running the Canon Boot Camp. I participated in a Boot Camp, which helped me fill in the gaps.

Now, I am one of the instructors at the Canon Boot Camp and frequently shoot with the Canon HDSLRs. As a poor college grad, purchasing the camera, the CF cards, and the gear was a big deal, but now I see how well the investment paid off.

Spending that extra money or extra time on something we are passionate about never goes to waste as long as we use it to improve ourselves. Always put the money back into yourself if you want to keep moving forward. Sometimes not making money and working for free is also an investment. This industry relies on a lot of free labor. I wish it wasn’t this way, but everyone is always looking for an intern. Depending on what you do as an intern, working for free for six months can really pay off. I would not have learned so much about the Canons and about editing had it not been for my willingness to work for free my first year out of college. If you are dedicated and passionate, someone will reach out.

Whether it is new gear or a workshop, don’t hesitate to invest in yourself! We may have pelican cases full of the best lenses, and the best rigs out there, but having the sharpest camera does us no good if we don’t understand how to use our tools. Taking an online course or a hands-on course helped me to understand what I was holding in my hands and how to best utilize it to create my visions.

For example, I always appreciated the look of depth-of-field in images, but it wasn’t until I understood every aspect of the camera’s functionalities working together that I understood how to achieve it, especially in a high-key outdoor situation. Without my first investment in the Canon HDSLR, I never would have landed where I am today, as one of the instructors of the Canon Boot Camp and the producer of the workshop!

Always move forward! Hope to see you at one of our workshops!

- See more at: http://blog.theassociation.tv/blog/the-association/page/2#sthash.mP5wCmNy.dpuf

You’ve got the camera. Now what?

The DVtec Multirig and stabilizerYou’ve got the camera. Now what? When filmmakers come to the Canon Boot Camp, one of the sections they look forward to is the gear demo. Thanks to our sponsors such as RedRock, Manfrotto and Alzo! Because of the size and dynamics of the camera, it can be used in so many ways and situations. Its size can be an advantage and a pitfall; but the right rig can enhance the camera. Also, because of its versatility, there are so many different types of rigs manufactured for the Canon HDSLRs and finding the right one for your specific type of work can be a challenge, yet it is so important.

I am a shooter that likes to operate mostly hand-held and as bare bones as possible. If I am moving around, I sometimes use a monopod for stability, but if I am stationary most of the time, the tripod is my best friend. If there is a rig that I recommend, it is the DVTec multirig, which I’ve written about previously, and will expand on below. So, this post reflects my personal experiences using rigs and helping people find the right rig for their specific style and type of shooting.

Meet “The Guinness Rig” from Fletch Murray/CineBootCamp on Vimeo.

A lot of HDSLR users go right for shoulder rigs. Maybe it’s because they’ve seen how cool Shane Hurlbut looks with one, or maybe it’s because they see the rigs being sold everywhere, so they must be a necessity. Such is not the case. I am personally not a fan of shoulder rigs because I feel that they restrict my motion while I am filming.

Also, the more accessories piled onto the rig along with the camera, such as a mic, a monitor, follow focus, etc, the heavier it gets on one side of your body. This makes it difficult to use it one-handed so focusing, zooming, etc can become more challenging. Shoulder rigs would be good if your shots are mainly shoulder level, like for a newscast, but I’ve found that my mobility is restricted if I’m trying to shoot lower than that, unless I put myself in some uncomfortable squats.

Recently, I was talking to a skateboarder who films skate events and he told me he was interested in using a steadicam while skating. I suggested trying the DVTec Multirig for more stability which sounded great to him until I mentioned that the great thing about it is the rod that comes down to the waist. All filmmakers I’ve told about this rig understand right away that the rod is ingenious. However, this time the response was completely different. He knew right away that it wouldn’t work. Why? Because if he fell off his board, the rod would be the death of him, plunging through his stomach while he went down hill at 35 miles an hour.

That’s when it really hit me how important rigs are to the specific type of filming one does. Not only could the wrong rig hinder you from capturing your shot, but it could also cause you some bodily harm. Seems like his original idea of using a steadicam might be his best bet. A big hit amongst skaters is the Scorpion by CamCaddie, or rigs like it. It can be operated with one hand and it is very lightweight.

There are so many different styles of rigs and gear you can use. Research and trial is key to getting the right equipment. Another accessory that people ask about a lot is follow focus. A follow focus ring and the actual gear can be cumbersome at times and inconvenient to use if you are on the wrong rig and operating as a one-man band. Again, personally, I like to be as light as possible. The rig I do recommend is the DVTec Multirig, which I mentioned above. It provides mobility, flexibility, and takes the weight off the shoulders.

A new rig soon to be out on the market that blows my mind is the movi rig by Firefly. It operates on an axis and a gimbal that provides supreme stability to the camera. You can shift the camera up and down, left and right, run with it, skate with it, operate it with one hand or two and your camera will always be level. Wanna see it in action? Check out this video:

Passion for Motion – Behind the Scenes from Freefly on Vimeo.

I’ve contacted the manufacturer about sending a demo for the Canon Boot Camp, but unfortunately they are unable to do that at the moment. I can’t wait to get my hands on one, but at approximately 15,000 dollars right now, I can just keep dreaming about it.

This was just a brief overview of rigs to emphasize the many different types of equipment that is available to us so that we can master our HDSLRs. Not all rigs are made equal and not all rigs will solve all problems, so shop carefully!


- See more at: http://blog.theassociation.tv/blog/the-association/page/2#sthash.mP5wCmNy.dpuf

3 Tips for a Perfect Custom White Balance

Setting a Custom White Balance

Setting a custom white balance is easier than you might think. It takes just a few short steps, but the key is to make sure the steps are done properly.

First, fill your frame with something white. You can use a white board, a grey card, a white wall or the actual light source. The key to doing this step correctly is to properly expose the image. You can check the proper exposure by tapping the shutter half way down until the light meter comes up. If your meter is dead center, you are perfectly exposed according to the camera. If it is to the left, you are underexposed, and if it is to the right, you are overexposed. This is a very crucial step to getting the proper custom white balance.

Now, take the picture. A lot of people I’ve taught have trouble getting the camera to actually take the picture of the full screen of white. This is because their camera is set on Auto Focus and it cannot focus on white because there is nothing to focus on. Therefore, it is attempting to focus and will not allow the picture to be captured. To fix this, simply put your camera on Manual Focus and you’ll see that with a simple click of the shutter, the image will be captured and you can apply it as your white balance.

Next, go to your menu and find the “Custom White Balance” tab. Once you select it, it will show you the image of the white you’ve just captured. You can also scroll through to select other ones if you’ve shot several white cards. Press “OK” to set it as your white balance and “OK” again.

Now that you’ve told your camera what white should look like, you need to apply it to your shots. You do this by going to your white balance selections and scrolling to the custom white balance icon. If you miss this step, your custom white balance won’t be used by the camera even if you have just set it.

Setting a custom white balance is effortless if you remember 3 very important things:

1.     Make sure your image of a full white screen is properly exposed

2.     Make sure your camera is on Manual Focus

3.     Make sure to select the “Custom White Balance” icon once you’ve set the custom white balance

One final tip: One a few occasions, I’ve seen the white balance skew to green where everything in the screen is green instead of white. To fix this, just do the custom white balance again. The white card you’ll fill the screen with will appear green, but setting the custom white balance will change that problem precisely because you are telling your camera that the green is actually white. Problem solved!

- See more at: http://blog.theassociation.tv/blog/the-association/page/2#sthash.mP5wCmNy.dpuf

CRM Software for Mobile Professionals

mobile_phone_with_handBy “Mobile Professionals” I mean anyone who runs their business while running around, on their phone.

“Running around” aptly describes many people in the film industry! But there are a lot of small business owners who also run their business from their cell phone. Tracking customer interactions and following up on sales can be a challenge if all your tracking software is in the office but you’re on location.

Annoyingly, many CRM softwares are overloaded with features you’ll never use, if only because you can’t figure out how to set them up. I remember a management consulting company I worked for had Goldmine CRM set up, and no one knew how to use it past entering and looking up contact information. Yet it had hundreds of “features.” In the end, the most of the “features” went unused.

Customer Relationship Management for EntreprenuersThen I found Base CRM, created by Future Simple.

The first thing I noticed (and liked) about Base was the features were stripped down to essentials, and everything about it was useful. They rely a lot on customer feedback when designing, not just what they THINK will be awesome. Their market research data collection is built right into the software, practically.

The second feature I liked was the mobile app. Now when a prospect (anyone I have in the Base CRM software as a contact) calls me, the app gives me a “follow up screen” with two main choices: “Add a Note” or “Add a Task,” both of which I simply touch to activate. I can leave as many notes or task as I wish, and date the tasks for completion if necessary.

As simple as Base CRM is, it’s also quite sophisticated. I integrated my email, so every email sent to and from my Base CRM contact list is automatically recorded in their contact file. I do wish text messages could be automatically recorded, but my workaround of copy/pasting each text (the important ones anyway) into the person’s contact record (as a Note) is fine for now.

For those moments when Mr. Big Client calls with several requests, but you’re driving and can’t take notes, Base CRM can automatically record incoming and outgoing calls, storing it right in the Contact’s interaction history. What a great feature for training others on how to call clients, or for Quality Control to see what happened!

If you or your team makes a lot of calls, Base CRM can save time by allowing you to quickly construct a Call List, and do the “dialing” for you. That’s right! After the first call ends, Base waits for 15 seconds, and then automatically calls the next person on the list for you. Meanwhile, if you have a script, it appears on the screen, along with a dialog box to record any notes while on the call.

The usual import/export tools are all there. CSV files, Gmail, Yahoo, etc., integrate seamlessly to get your contacts “on board” and set up is a snap. Companies can be recorded as contacts separately from individual company contacts, while also linking employees to their company so you can see the connection.

Track current sales and forecast future sales while also seeing the source of the sales. It really is ingenious. The trial period is practically indefinite, as it’s based on the number of “Deals” you track. You get 50 deals up front, free, and then after that you have to purchase the software. It’s affordable, and should pay for itself just by preventing losses due to neglect or accidentally letting deals or contacts fall through the cracks.

You can even use a built in Lead Capture Page on your website or as part of your corporate social media network to capture leads straight into Base, saving the time it would take to manually input contact info. Overall I’m very impressed with the software, and can highly recommend it.

Click here for a tour and to check out the free trial. I’ve covered some of what the software can do, but I’m not match for the original! You have to see it yourself to believe it.

- See more at: http://blog.theassociation.tv/blog/the-association/page/2#sthash.mP5wCmNy.dpuf